
Char Crusher
|
Char Crusher |
|
The coal and char available for our 5" gauge locos is too big and people use a hammer or multigrips to produce smaller pieces. Large pieces won't fit through the firehole and even some that do are too large for the fire and the resulting holes in the fire affect the steaming ability.
Rather than spend hours helping break the char chunks I decided to make a hand-operated impact crusher. Necessity is the mother of invention.
I had a 500mm length of 6" pipe and a longer length of 1" water pipe. My idea was to make a grid from 30mm lengths of the 1" pipe and fit this grid in the 6" pipe. Then I could use a ram to crack the char into pieces that would fall through the grid. Since the pipe is 1" all pieces of char should be less than 25mm.
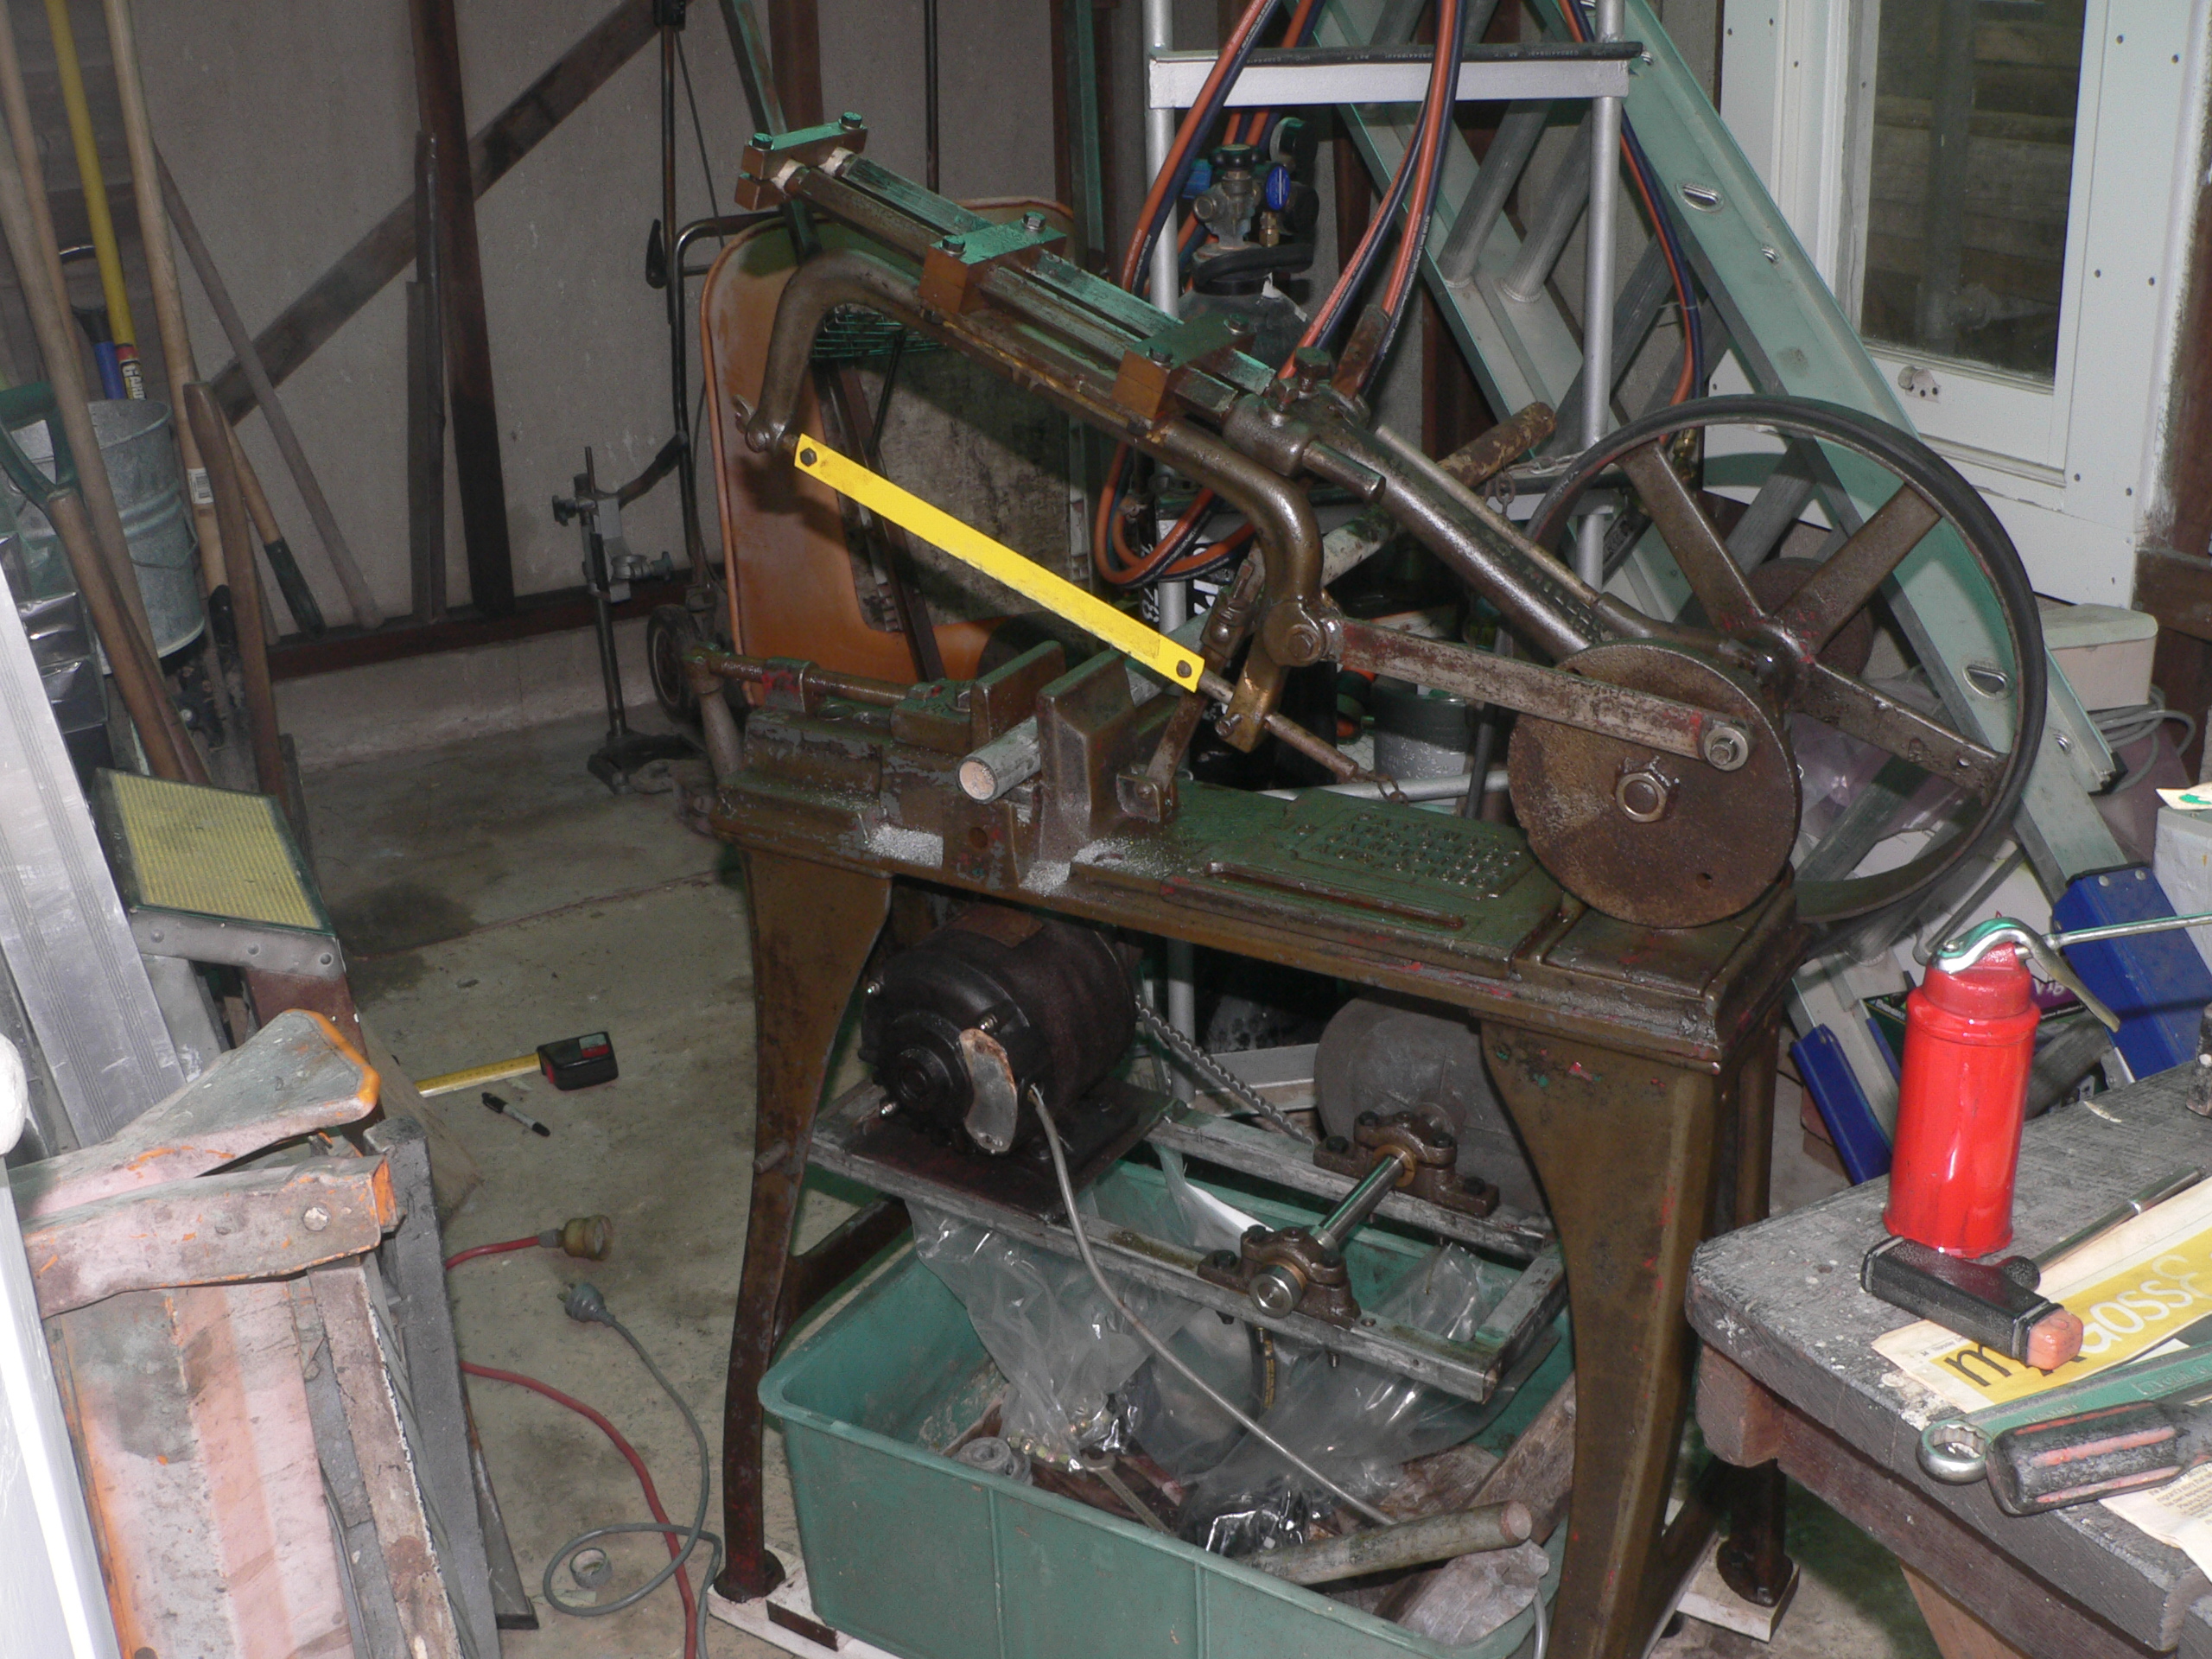
Cutting about 20 short lengths of the pipe was a daunting task until I remembered my ancient power hacksaw. This Millers Falls product (circa 1893) was given to me years ago in a very sad state. Originally it was powered from an overhead lineshaft. Someone had fitted a tray underneath with an electric motor. All this was badly rusted and required a total rebuild. The motor needed a good clean and replacement of the internal wires connecting to the windings. The saw's precision was bad due to sloppy bearings so I stopped the restoration at this point. For this project the lack of precision didn't matter so I dragged the saw out of the shed and spent about 30 minutes cutting the 1" pipe into 30mm lengths. The new blade was a welcome treat.
The saw is missing a vital counterweight to control the downward force on the hacksaw blade and also a power switch. Operation here involves connecting the plug to the extension cord and holding the slide bars to control the cutting force. Definitely not an ideal setup.


Naturally (although I had hoped otherwise) the pipe pieces didn't fit neatly into the large pipe. Rather than stack the pieces as in the first photograph here I decided to make a ring of pieces first and then fit pieces inside that ring. Of course this still left a big gap so I cut the last piece and reduced its diameter so it fit in the space. Then I welded all the pieces together, pushed the grid inside the pipe, and finally welded the grid to the inside of the pipe. The bottom of the grid is 170mm from the bottom of the pipe. This gives me a collection area height of about 160mm. The top of the grid is 200mm high and there is plenty of room for char above. Making the grid from pieces of pipe is better than drilling holes in a large plate as the gaps between the pipe pieces allow tiny chunks to fall through rather than being crushed to dust.

The ram needs to be long enough for a person to bash the char without bending over and also heavy enough to impart enough force to break the char. I used three rollers (80mm dia, 25mm thick) and fitted them to a length of 1" tube with flanges welded on. This avoided drilling and tapping the rollers. Welding the rollers wasn't an option because they are cast iron.
The initial idea is to put the crusher in a bucket (e.g. 4L paint tin) and after breaking some char lift the crusher to reveal a tin full of small pieces. Flared legs under the crusher seem a good idea except that it might be more inclined to bounce and the load would be concentrated on three or four small spots. So we'll try the easy option of using a bucket first.

The first test was okay but the pieces are rather small and there is lots of dust. The best way to use the crusher is just to put a single layer of char in the crusher and give it a few hits with the ram. If there is more char there is far too much dust. Still, it's easier than breaking individual bits with a hammer.
The crusher was given to a friend who tried it for a while and decided it created too much dust. Recently I got it back and used it to break up some coal. This went well and there was less dust than expected. Bashing coal is rather noisy and not neighbour friendly. The crusher has survived and none of the welds have cracked so far. If I ever fix this crusher or make another one I'll make the grate removable.
Last modified 2013-03-22